Tuesday, 28 September 2010

Quick and Easy Valkia The Bloody

There are many conversions of Warriors of Chaos Character, Valkia The Bloody. I have recently made my own with very little conversion work. Involved and just a handful of parts.

The model uses the body from the Witch Hunters model Celestine the Living Saint. I then beheaded her and replaced her head with a Seekers of Slaanesh Champion Head and gave her the Winged Backpack from the Chaos Space Marines Possessed as well as a shield from the chaos knights box. The spear is made from the a standard pole from the Wood Elves Glade Guard and a Bloodletter Hellblade although the spears from the Chaos Knights would also look pretty awesome. Apart from a couple of skulls I added to her base that is pretty much it. Took me just a few moments to make and only a tiny bit of green stuffing was used to cover up where her Witch Hunters symbols were on her thighs and her shoulder symbol was filed off.


Daemon Prince update: I attached his other front arm. Then he fell of my desk and now has no arms. They wilkl be reattached when he is mounted to a base :(

Monday, 27 September 2010

Of White and Washes

I love the Citadel washes from GW. They are a great improvment from the old inks they produced and can be used for various effects to make an average painter like myself look better than I really am. This little guide will show one method to do just that as well as paint lots of models very quickly.

It all comes down to starting with a white undercoat. You need it to be a smooth as possible for the best results. I used the GW skull white spray paint for the models shown here and must admit the undercoat could have been better had I had more time and better conditions to do these with.

The four Tyranid models below have all been undercoated white and then had 3 layers of different GW inks applied to them to paint their skin tone. The top model's use Leviathan Purple and Ogryn Flesh and the bottom two use Baal Red and Thraka Green. You can use more or less layers to get darker or lighter shades. I am going to use the purple and blue colour scheme to paint my newly aquired Trygon.


Just by applying laters of GW washes over white can produce some really good results and not just for Tyranids either. This space marines armour from my Spartan Space Marine Army has had 3 layers of Sepia wash over his armour to give it that tan colour.


Using the washes in this way gives you automatic shading for your armour or alien skin which means you can paint that Tyranid horde a lot quicker and still maintain a very good table top standard.

Saturday, 25 September 2010

Daemon Prince II Update

Here's an update for my second Daemon Prince. I have added the Griffin Wings, and Lord of Change right arm to the High Elf Dragon body, tail and head. I have replaced his back feet with the talons from the Griffin and also added green stuff feathers to his back legs. I am awaiting my staff arm from eBay and base from Scibor so in the meantime all I can do is the green stuff work on his head which involves filling in the gaps and making a beak.


Wednesday, 22 September 2010

Daemon Prince Mash Up... Init?

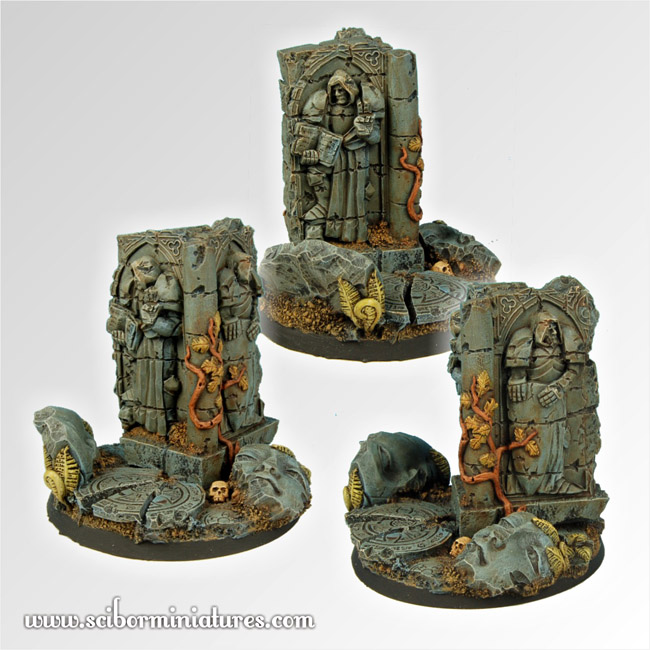
So you've seen my first Daemon Prince built so what about the second? I am using a lot of bases from Scibor Miniatures for this army and this is a fantastic base that I am using for this guy.

I thought it would be cool to have him leaping off the ruins much like the High Elf Dragon so I decided that I shall use this model as the base. I didn't know what to use for the wings and then last week I saw the Griffon from the Island of Blood boxed set and thought that would be perfect! Add the claws from this model and it's all coming together nicely. I also have parts from The Lord of Change that I could use. Below are my collection of bits so far.


Since gathering these parts I can see that the head from the lord of change is way too small so this head from the High Elf Dragon will be a good alternative. I will test my green stuff skills by scultping a beak and also I will sculpt some feathers on to the model. I am now waiting for the Lord of Changes staff to arrive from eBay and I will have every piece I need.

More updates will come once I start building this bad boy.

Tuesday, 21 September 2010

Crimson Fist Assault Terminators

I've finshed the first two Assault Terminators for my Crimson Fist army. The rest of the squad will have pairs of lightning claws.

Monday, 20 September 2010

Toys for Tots Update

I have pretty much finished the first 3 miniatures from the command squad. I will go back to add a few more highlights at some point as I'm not really happy with these at the moment. As i'm working with a deadline I will now get the other 3 painted up first and then work on the Razorback before I do the extra highlights just to make sure I have them at tabletop standard at least before the deadline.

Nurgle Up Those Marines

As you know by now I love Forgeworld models and the Death Guard upgrade is awesome. The only drawback is that you do not get backpacks, legs and arms and the Chaos Space Marine plastics can look quite bare compared to the forgeworld parts so you end up with a model with highly detail parts and bare parts. There are several methods you can do to make the plastic parts more interesting and Nurgle-esc.

Guitar String
Guitar string can be used to add random pipes sticking out from your marines. They can be tricky to bend so I have not used a lot. I plan to paint the tubing on my Plague Marines to look like maggots.


Green Stuff
You can go nuts with green stuff for Plague Marines. You can create rotting armour, boils and even guts without even needing to be a green stuff expert. I can barely fill gaps with the stuff but when it comes to Nurgle I can just stretch it and poke it until I get something that looks very effective.


Drilling and Carving
This method I have used more than the other two as it is quicker and easier and still gives great results. Just by drilling holes and carving away at the armour with a hobby knife gives you nice holes in the armour that represent Nurgles rot or acid corroding the armour away. The same method can also be used for bullet holes and battle damage.


I hope these simple methods have given you some ideas if you plan to make your own Death Guard Plague Marines using the lovely Forgeworld parts. Below is the full 7 man squad.